Floor Plan to 3D Guide
Prepare a readable floor plan, choose the right visual assumptions, and verify a 3D concept before using it in a design conversation.
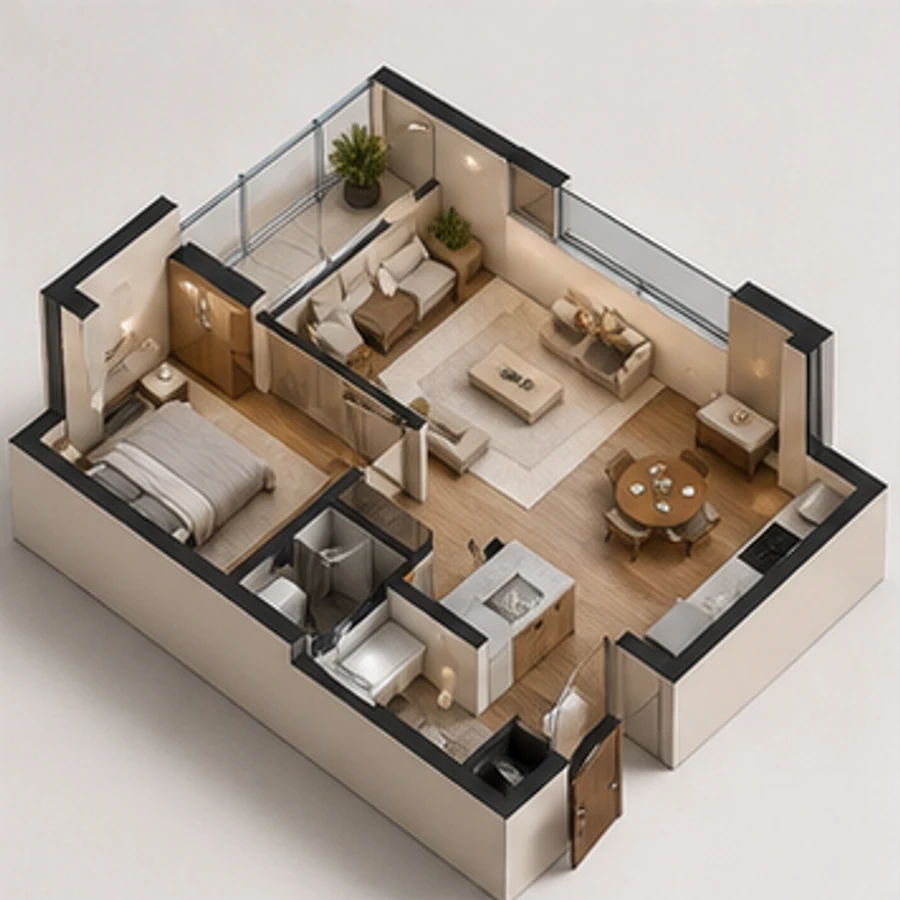
Turning a floor plan into a 3D image is useful because many people understand volume, furniture, and circulation more quickly in perspective than in linework. The conversion is also full of assumptions: a 2D plan may not specify ceiling height, window head height, materials, lighting, or furniture style.
Use the floor plan to 3D tool to create a concept, then check those assumptions before treating the image as a design decision.
Start with a readable plan
The source should have high contrast, straight orientation, and minimal visual noise. Include the full external boundary and avoid cutting off dimensions or room labels. A clean export is better than a tilted phone photo.
Before uploading, check that the plan clearly shows:
- Walls and openings
- Door swings
- Windows
- Stairs and changes in level
- Room names
- Fixed kitchen and bathroom elements
- At least one reliable dimension or scale reference
If the plan needs correction, use the AI floor plan editor first. If no plan exists, start with the floor plan generator, then verify every dimension manually.
Decide what kind of 3D result you need
There are three common outputs:
- Top-down furnished plan — best for explaining zoning and furniture relationships.
- Axonometric cutaway — useful for understanding room connections and volume.
- Eye-level interior view — better for atmosphere, but it introduces more assumptions and may not show the whole plan.
Choose the format based on the question. Do not use a dramatic eye-level render when the decision is about circulation across the entire home.
Supply the missing vertical information
A floor plan describes horizontal geometry. A 3D concept also needs ceiling height, door height, window sill and head heights, stair direction, and any slopes or bulkheads. Add these details in the prompt or project notes.
When the information is unknown, label the result as an assumption. A visually plausible ceiling is not evidence of the actual building condition.
Keep style separate from geometry
Run a neutral geometry pass before asking for a strong interior style. Use simple materials and ordinary furniture to check room boundaries, openings, and circulation. Once the volume is credible, create styled variations.
This two-step method makes errors easier to spot. If geometry and decoration change at the same time, a beautiful finish may distract from a misplaced door or compressed room.
Use a structured prompt
Include:
- Desired view type
- Floor and ceiling assumptions
- Elements that must match the plan
- Furniture density
- Style and material family
- Areas that should remain empty for circulation
Example: Create a top-down axonometric 3D view from this plan. Keep all walls, windows, door openings, stairs, and room proportions aligned with the drawing. Assume a 2.7 m ceiling. Use light oak floors, warm white walls, and simple contemporary furniture at realistic scale. Keep circulation paths clear.
Verify the result systematically
Compare the plan and render side by side. Trace the perimeter clockwise and check:
- Every wall turn
- Number and position of windows
- Door locations and opening directions
- Stair position
- Kitchen and bathroom fixture zones
- Relative room proportions
- Furniture blocking doors or circulation
Then check vertical assumptions and materials. Do not approve the image only because the overall composition looks convincing.
Understand what the render cannot prove
An AI 3D image is not a building information model, measured survey, permit drawing, structural analysis, or quantity takeoff. It should not be used to infer exact dimensions that were not supplied.
For professional work, the source drawings remain authoritative. Use the generated view to align stakeholders, identify questions, and communicate a possible experience of the plan.
A reliable handoff package
When sharing the result, include:
- The original floor plan
- The generated 3D image
- A list of assumed heights and materials
- A list of known mismatches or unresolved items
- The intended use: concept review, marketing, or design discussion
If the next decision concerns one room, continue with AI room design using a room-specific view. If the goal is property marketing, separate conceptual changes from honest virtual staging.
The strongest floor-plan-to-3D workflow makes assumptions visible. That is what turns an attractive render into a useful communication tool.